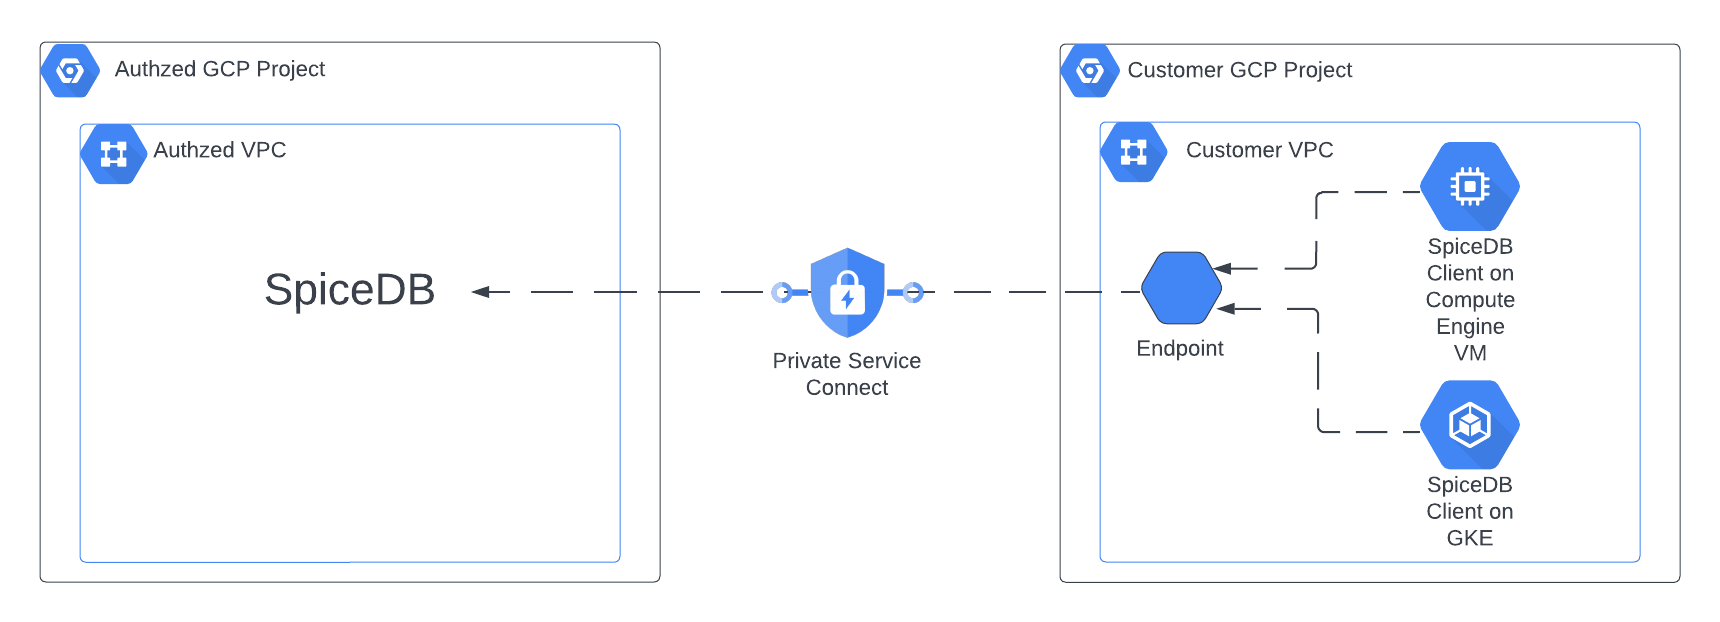
GCP Private Service Connect
Most users of SpiceDB Dedicated on GCP privately connect to SpiceDB with GCP Private Service Connect. Private Service Connect enables a private connection from your GCP Project and VPC to SpiceDB. Users of SpiceDB Dedicated also have the option to configure SpiceDB to be accessed from the open internet.
Connect to SpiceDB Dedicated with Private Service Connect

Prerequisites
Before you can start using SpiceDB Dedicated, you'll need to get in touch with the Authzed team.
Step 1: Configure the VPC Endpoint
- Navigate to “Private Service Connect” and make sure you are on the “Connected Endpoints” tab.
- Click “Connect Endpoint”
| Option | Selection |
|---|---|
| Target | “Published service” |
| Target service | This will be provided to you by Authzed |
| Endpoint name | Name this whatever you want |
| Network and subnetwork | Select the networks you need connectivity from |
| IP address | Choose whatever IP you'd like |
Step 2: Enable DNS
Navigate to Cloud DNS and create a zone
Option Selection Zone type private DNS Name This will be provided to you by Authzed Networks Select the network where the Private Service Connect endpoint is deployed Add record set
Option Selection DNS name This will be provided to you by Authzed IP address Enter your Private Service Connect endpoint IP
Step 3: Add Permission System
- Login to your SpiceDB management console
- On the homepage, select "Add Permission System"
- Configure your permission system to your liking and create it
- If you enabled Fine Grained Access Management (FGAM), configure it and provision a token. Otherwise, provision a token without FGAM
Step 4: Verify Connectivity
Verify connectivity from client machine with the Zed CLI tool
zed context set permission_system_name example.com:443 sdbst_h256_123
zed schema write example.yaml
zed schema read
The last Zed command should display the schema to your terminal. If you encounter an error with any of the Zed commands, reach out to us via support@authzed.com or via your shared Slack channel.